Five Game Solo Archipelago
Decided to write down an Archipelago game. Covered one before. Chooses to write down more about the specifics and gameplay. Begins with a quick primer on Archipelago games.
What is Archipelago?
Start by imagining a standard game of Pokemon Red. Heads to Pewter City to battle Brock for the Boulder Badge, then Misty for the Cascade Badge. Heads to the SS Anne for the Cut HM later.
Randomizes all of that. Flings all the items throughout the game, with some means of logical progression. Might find the Surf HM in Virdian Forest and the Soul Badge in Mt Moon. Opens up Cinnabar Island, which may be where you need to go to progress further in the game.
Now take it one step beyond that. Mixes up all the items in multiple games. May grab a Bow and Arrow from Brock, which you need for Eastern Palace in A Link to the Past.
Uses the words "item" and "check" interchangeably. Finds multiple items/checks in Mt Moon, for example.
Unlocks hints by getting a certain number of checks too. Set it to unlock one hint for every 10% of the game's checks you get. Tells you where the item you specify is located (in which game and where).
The games: Selected Pokemon Red, A Link to the Past, Slay the Spire, Terraria, and Stardew Valley. Selects any combination of supported games, including multiples of a game. (Never tried Stardew Valley, by the way.) Must complete all of them to win. Releases all of a game's remaining items upon clearing the individual game's victory condition.
Played all of these games locally, with no other people or connecting to a server. Swaps between games as needed. Will cover the rules and tweaks of each game as they come up. Jumps into it for now.
Stardew Valley
Led with the newest game first. Wanted to make sure everything worked, more importantly. (Took some time. Downloaded the stuff for this earlier. Updated everything since then.) Plays this on version 1.5.6, also (not the latest).
Rules and Tweaks
- Win condition: Complete the community center
- Farm type: Random
- Starting money: Rich (5000)
- Sell prices: Normal
- Entrance Randomizer: Off
- Bundle randomization: Remixed (may contain thematic changes, remixed, or custom ones)
- Bundle price (number of required items per bundle): 40% Cheap (1 less item), 50% Normal, 10% expensive (1 more item)
- Seasons: Randomized (Must find other seasons.)
- Cropsanity: On (Earns an item for harvesting a crop for the first time)
- Backpack: Early progressive (Will find the first upgrade, then the large upgrade early.)
- Tools: Progressive
- Skills: Progressive
- Buildings: Progressive cheap (1/2 cost for the check. No cost for the first building, if found.)
- Festivals: Easy
- Elevators: Progressive from previous floor (Gets an item from each mine floor. Must progress through the mines for the check.)
- Arcade: Disabled
- Special Orders: Town board only
- Quests: Minimum (7 help wanted + ...story?)
- Fishsanity: Exclude Hard Fish (Checks for fish. Only for fish below 80 difficulty.)
- Museumsanity: Milestones
- Monstersanity, Shipsanity, Cooksanity, Chefsanity, and Craftsanity: Disabled
- Friendsanity: Every 4 hearts. Starting NPCs only.
- Movement buffs: 4-8 in the item pool
- Luck buffs: 4-8 in the item pool
- Traps: Disabled
- Multi-day sleep: Enabled and free
- Experience and Friendship multiplier: Double
- Debris: Half
- Quick Start: Yes (free automation items at the start)
- Gifting: No
Consists of quite a few options. Will not be quite this long for every game.
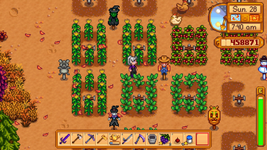
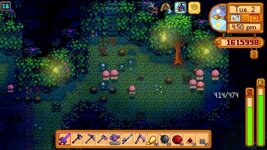
Begins in Summer. Remains stuck in that season until another is found. Rooted through some packages on the ground (from Quick Start) for 4 Quality Sprinklers, 5 chests, 2 Autograbbers, 2 Autopetters, a Telephone, and a few other things. Good. Appreciates those sprinklers in particular. Cuts down on watering time significantly. Happily wears the free Iridium Band too (+10% attack, magnet, and light).
Glanced down birthdays. Likely labels these NPC friendships as "in logic". Makes do with daffodils for the first two, at least.
What else? Excluded Pufferfish, Octopus, and Super Cucumber among the Summer fish.
Ended up on the standard farm. Planted the free wild seeds. Looked for people to talk to to begin the friendships rolling (plus the Introductions quest). Burned energy on chopping trees, smashing rocks, and digging up an artifact. Received some progressive key cards for Silph Co, but nothing immediately nice.
Hoped for an early Shipping Bin. Saw no sign of it. Checked all the shops. Found a Boulder Badge for super cheap. Bought a progressive Coop and Barn for a pittance. No Shipping Bin, though. Also notes the Volcano Dungeon back exit among Robin's blueprints. ...Is Ginger Island accessible? Did not exclude it. Normally unlocks it after completing the community center. Figured it would be off the table.
Finished the Introductions quest. Got Poppy Seeds. Bleh. Not particularly useful, other than raising farming skill and friendship with Penny.
Thankfully found a progressive fishing rod from a simple Help Wanted quest (gather 20 stone). Opens up the world of fishing and decent income (via selling to Willy). Fished up a progressive sword for Link to the Past from a Sunfish. Welcomes that for sure. Cannot get too many fish, however. Limits you to sub-50 difficulty fish with this fishing rod. Works just fine for increasing fishing skill, which was the Magic Mirror for Link to the Past at level 3 fishing.
Turned in three artifacts. Got the recipe for the Desert Obelisk. Was pretty pleased about that. Bypasses the bus entirely. (Did not need to get the wizard's ink either.) Provided a great source of powerful food: Cactus Fruit. Heals a ton. Uses that and coconuts for a few gifts, as a bonus. Nothing in the shop, however.
Got trolled by the mail. Said to look in Aginah's Cave (a Link to the Past place) to unlock the Community Center. Thought you unlocked the Community Center a few days in. Felt like it was taking a while. Opened up on its own, though.
Realized something rough around now. Looked through the bundles. Definitely goes to Ginger Island, likely by obelisk. Requires Magma Caps for one of the bundles. Contained some other rough bundles too, like Slime Eggs. Almost certainly needs a bunch of Foraging skill because of the gold star quality beach shells. Might have started something way too long.
Copy/pasted the bundles from the spoiler log.
Struggled through the mines with the base pickaxe and no sword. Mainly went for copper. Spotted two big Link to the Past items in the blacksmith's upgrades: Fire Rod and Pegasus Boots. Could not pass those up. Wanted to spend the remaining 3000 gold on the Starfruit from the Luau (to put into a Seed Maker later). Could not pass up those. Will probably redo Summer anyways.
Really hoped to get a better Fishing Rod, a sword for the mines, or a better Pickaxe. No luck on those. Received some fancy items, however: the Return Scepter (free teleport home whenever) and the Golden Clock (less farm debris + manually advance time). Never got either in a normal playthrough.
Started feeling slow in progressing. Only has Blueberries and Poppy Seeds at the moment. Bailed a day after the Luau. Grabbed a Progressive Slingshot (terrible), a Flash HM, and Cane of Somaria (Link to the Past) before switching games.
Link to the Past
Usually goes in order of most to least checks at the start. Experiences the randomizer more that way, if that makes sense.
Rules and Tweaks
- Win condition: 80% crystals + kill Ganon, 10% Master Sword pedestal + kill Ganon, 10% Triforce hunt + kill Ganon
- Mode: Open (Skips the opening of escorting Zelda.)
- Glitches: No
- Dark Rooms: Requires Lamp
- Pyramid: Goal (open if Ganon is the goal. No Agahnim 2 required.)
- Crystals: Random-low for Ganon's Tower, Random for Ganon. (Note: Could still be a high number for random-low.)
- Triforce pieces: 30-40 available. Divide that by 1.5 for the number of required.
- Entrance shuffle: No
- Big Keys, Compasses, and Maps: 5% original dungeon, 5% own dungeons, 10% own world, 70% any world, 10% different world
- Small Keys: Original dungeon
- Key drop shuffle: Off
- Items: Normal item functionality and pool
- Enemy health and damage: Standard
- Progressive items: On (Swords, Bows, Gloves, Shields, Armor)
- Swordless: No
- Dungeon counters: On
- Retro bow and caves: Off
- Hints: Full
- Scams: Off (Knows what items some merchants have.)
- Boss shuffle: 20% none, 50% basic, 20% full, 10% chaos
- Pot and bush shuffle: Off
- Enemy shuffle: 50% on, 50% off
- Killable thieves: 50% on, 50% off
- Shop item slots: Random (Turns between 0 and 30 shop items into checks)
- Shop cost: 50-150% of normal. Costs rupees, not other resources.
- Capacity Upgrades: 20% off, 30% on, 50% on combined.
- Bombless start: 50% on, 50% off. (Needs a "Bomb Bag" before being able to carry bombs, similar to Ocarina of Time.)
- Random medallion for Turtle Rock and Misery Mire
- Fake boots: 50% on, 50% off. (Mostly a speed increase without the functionality of the boots.)
- Traps: Off
- Timers: Off
Another long list of rules. Is a pretty well-known game for randomizers, though.
Noticed something odd immediately. Shows the Triforce Hunt tracker at 0/1. ...What? Should be a lot higher than 1. Does that just mean get the Triforce from beating Ganon? Never appeared before. Set it on "Normal" for the display. Also never had a chance of Triforce Hunt in there, to be fair.
Went through the standard opening checks. Wound up with the enemy randomizer setting on. Has some benefits. Carried a fish near Kakariko to the bottle vendor. Gives you a nice assortment of resources. (Also, no bomb bag shuffle.) Popped into some shops. Contained no Archipelago items. Noted the 52 rupee bombs (usually 50), so near standard prices.
Found Stardew Valley's Key to the Town, Sunday Traveling Merchant, and three new crop seeds (but no useable ones). Notably found the Cascade Badge and Cut for Pokemon. Sees Rock Tunnel in that game's future.
Headed into Hyrule Castle for the front of the escape sequence. Snagged a prize in the first chest: Stardew Valley's shipping bin. Thank goodness. Also found another fruit tree seed too, but none that yield fruit in summer.
Finished that and walked to Eastern Palace. Pulled a Hammer in the back of Sahasrahla's hut. Already got a Moon Pearl from Kakariko. Almost accesses Dark World. Needs a glove next.
Encountered quite a hint. Earns the Lamp by completing Stardew Valley's Fresh Fruit quest. Triggers that in Spring of Year 2. Does not know if it needs to be your fifth season and/or if Spring is required. Placed that super late, though. Lowers the odds of the dark rooms having anything significantly.
Tried out the dark rooms here anyways. Strays out-of-logic, but eh. Got nothing good from that. Died in the dark room heading to Armos (after grabbing some cash). Declined to head back in. Walked away with a major item, however: the Rod of Discord for Terraria in the first chest of Eastern Palace. Covers that when it comes around to Terraria.
Exhausted all the checks in Link to the Past. Evidently stuck the dungeon big keys in their own dungeon. Received quite a few items, but not a combination that progresses Link beyond the standard opening checks. Time for a switch.
Pokemon Red
Enters with three badges (Boulder, Cascade, and Soul) and two HMs (Cut and Flash). Feels pretty novel, despite being the vanilla progression stuff. Never gets Cut and its badge this early.
Rules and Tweaks
- Win condition: Beat the Elite Four
- Badges for the Elite Four: 10% 6 badges, 20% 7 badges, 70% 8 badges.
- Key items for Elite Four: 0
- Victory Road unlock: 4-7 badges
- Route 22 gate: 3-6 badges
- Viridian Gym: 0-7 badges
- Cerulean Cave: Random badges, random key item requirement
- Route 3 access: Beat Brock
- Fossil choice: Any items
- Second fossil option: 3 fossils
- Experience All: Start with
- Early Parcel
- Badgesanity: On (Adds badges to the item pool.)
- Badges for HM moves: Standard
- Tea: On (Like the FireRed/LeafGreen Tea. Gets you past the gate guards.)
- Extra Key Items: On (Requires a new item for Safari Zone, Rocket Hideout, Cinnabar Mansion, and Power Plant. +4 items to Rock Tunnel.)
- Silph Co card keys: 25% on (split), 75% progressive
- Extra Strength boulders: On (Blocks the Route 11 gate and Route 13 path)
- Hidden items: Not randomized
- Prizesanity, Trainersanity, Dexsanity: Off
- Oak's aides: 1-30 Pokemon each
- Stonesanity: On (Adds the evolution stones to the pool.)
- Door and warp tile Shuffle: Off
- Rock Tunnel: Requires Flash, logically
- Fly: 50/50 on one free location. One guaranteed free location from the Town Map.
- Blind trainers: 50% totally blind, 50% chance of partial blindness (50-100%).
- Level scaling: 10% off, 50% by spheres (think of spheres like progression), 40% by spheres and distance
- Experience modifier: Double
- Wild Pokemon: 40% match base stats, 40% match type and base stats, 20% full random
- 1-to-1 area mapping: True (Replaces all instances of a Pokemon with the same Pokemon.)
- Randomize starter: Full random
- Randomize static Pokemon: Full random
- Randomize legendaries: Full random
- Catch 'em all: Off (Should have made all Pokemon available. Whoops.)
- Pokemon stats: 20% shuffle (same stats, just in different spots), 80% randomize (same stat total)
- Catch rates: Random. Minimum catch rate of 100-200.
- Trainer parties: 40% match base stats, 40% match type and base stats, 20% completely random. Can have legendaries.
- Moves: No rebalancing. Fix bugs (like Focus Energy)
- Movesets: 50% prefer types, 50% completely random. 100% start with 4 moves.
- Transform: Ditto only.
- TMs: Randomize moves. Reusable. 80-100% compatability for same type, 50-75% for a Normal move with a non-Normal Pokemon, 30-80% for other types
- HMs: 90-100% compatability for same type. 100% for normal type HMs. 30-80% for other types.
- Move types, Pokemon types, and type matchups: Standard
- Shops: 90% normal, 10% better (larger inventory baseline)
- Poke Doll skip and Bike Gate skip: Patched
- Traps: Off
Forgot how many options were in Pokemon Red. (Skipped some minor options for the previous two. Listed
most here.) Gets shorter from here onward.
Gladly withdrew Oak's Parcel from the PC and walked towards the lab. The three starters: Eevee, Zapdos, and Goldeen. Would have been happy with Eevee, as a Pokemon with good base stats. Was not going to pass up Zapdos, though. Started with Drill Peck as a kicker. Eyed up its stats. Looked pretty even still, with Attack being the best (not including Hitpoints). Probably just shuffled the numbers, not redistributed them.
Ooh. Apparently got a Spore TM from Stardew Valley. Cannot learn it on Zapdos, sadly.
Discovered the results of a few more random settings quickly. Encountered a Weedle on Route 1, indicating randomized Pokemon with the same base stats. Needs 8 badges for the Elite Four, per Dewy (the rival, named after the Stardew Valley character, the real final boss of this whole Archipelago). Flitted by trainers without a battle, indicating completely blind. Definitely got full random enemy trainer teams, as evidenced by a Mew on one. Rolled the standard shops.
Checked the Viridian City gym. Does not know the badge requirement. Apparently met it. Tangled with the first trainer to see the level: 22, double Zapdos's level. Indicates it being a little ways into the logic, but not
too far. Defeated the Metapod lead, but not Lapras. Saves this for later.
Picked the way to Pewter City clean. Unfortunately requires 24 Pokemon for a progressive armor upgrade for Link to the Past. Definitely wants that. (Is not
that skilled at it.) Chucked balls at Pokemon along the way. Leans towards a low minimum catch rate. Broke out of too many balls (admittedly at full health). (Post-game edit: 184 minimum catch rate. Really?)
Beat Brock's level 9s no problem. Peeked into Diglett Cave. Caught a level 12 Slowpoke and noped out for now.
Skipped right past the gauntlet of trainers to Mt Moon. Wandered into a level 16 Nidoran female. ...Strange. Why is this so high level? Tends to be lower. Cannot be later in logic. Accesses this from the outset. Must be scaling levels by spheres and distance. (Post-game edit: Nope! By spheres.)
Exited Mt Moon with a Stable for Stardew Valley (nice for movement speed) and a Mansion Key (for Cinnabar Island) at the fossil choice. Not bad.
Never took Misty for a caffeine person. Handed over a Coffee Machine after winning.
Cleared out the area north of Cerulean, Vermilion City, and the Viridian Gym after a backtrack. Was clearly being funneled into Rock Tunnel. Preferred to finish everything before that, just in case. Yielded nothing major. Regretted not buying Super Repels for Rock Tunnel. Hit so many encounters. And why were there level 11-13 Meowths? Why is that lower level than Mt Moon? Grabbed the Friday Traveling Merchant for Stardew Valley in there, at any rate.
Popped into Pokemon Tower in Lavender Town. Holds plenty of items. Wondered more about the levels, especially after Rock Tunnel. Hovered around 21-22. Should find a Silph Scope soon, in that case. (Saw the Silph Scope accessible after the Elite Four before. Found it in an 8 badge Cerulean Cave, versus a 7 badge Elite Four. Made the ghosts higher level than the Elite Four.) Seriously got a fourth non-Summer fruit tree from there. Literally found all the non-Summer fruit trees. Picked up some Ancient Seeds, which are a great, renewable money-maker. (Fall only, though.)
Continued down the logical path to Celadon City. Beat Erika. Nothing major. Hit the wall in Pokemon. Time for another switch.
Terraria
Runs on version 1.4.3(?). Not the most recent one. Plays on Journey Mode on a small world, typically with the difficulty at Normal. Bumps it up to Expert sometimes for a Treasure Bag. Could get pretty ugly if you play pure Expert. Faced Duke Fisheron once, right after beating Plantera (no dungeon access, no Golem, no Goblin for accessory stuff). Would have been a hard wall, most likely.
- Win condition: Defeat Golem
- Exclude locations: Big Booty, Rainbows and Unicorns, Don't Dread on Me (Fills those with unimportant items.)
- Achievements: Exclude Grinding (Excludes fishing ones too.)
- Fill extra checks with useful items
- Additional mod: Upgraded Research (Cuts the required research number to 1/4 the normal, mainly.)
See? Much shorter. Gets checks from defeating bosses and achievements. Excluded the three locations for being kind of grindy (0.1% chance for a key, same chance for a specific key + 1% drop chance on unicorn, and 10% chance for a tough miniboss during a Blood Moon.)
Chose Golem for being kind of longer, but not as bad as the Moon Lord. Includes a lot of slow things with Moon Lord goals (lots of invasions).
Needs only a few things to access Golem:
- Hardmode
- Plantera boss flag
- All three mechanical boss flags (to beat Plantera for the pyramid key) OR a Rod of Discord (a possible item for teleporting in).
Already got the last item on the list. Could be in for an early Terraria finish. Notably earned zero boss flags and a handful of items from all the gameplay before this. Does not restrict the game too badly, though. Mainly gets NPCs from pre-Hardmode boss flags.
First order of business: make some housing. Built five standard newbie rectangle houses (all connected) and called it good. Rolled Corruption randomly on the seed. Ran into it pretty quick. Engulfed the desert entirely (unless there is another). Found the dungeon in the middle of the snow biome. Delved into some big trees beyond that. Hoped to see a gnome (for the achievement), but no luck. Also hoped to get Hermes Boots. Checked every visible chest along the left side of spawn. Nope.
Sufficed for some quick exploration. Set about on knocking out basic achievements: almost die to a fall, make an anvil, and make a crafting table. Expanded the apartment building (basically amounts to that) to 15 spaces while it was dark. Suffices for the run, probably.
Okay, what about the right side? Immediate jungle. Has never seen it so close. (Discovered later it extended below spawn, close-ish to the Underworld.) Proved to be an excellent jungle for this. Found a tunnel connecting to a beehive. (Might count as Surface level.) Saves searching for that.
Explored further. Found some Hermes Boots in a chest. Wore those immediately. Got the achievement for surviving your first night, which was Link's Hookshot. Nice, but not progression yet.
Finally crafted an anvil. Unlocked the Island North Turtle for Stardew Valley. Means Volcano Dungeon access. Needs that...eventually. Would get absolutely shredded there.
Hit progression by building a rope to the top of the map: Link's progressive glove. Opens up a huge amount of Dark World, in combination with the shiny new Hookshot granting a way to dark Kakariko.
One more amazing part of the jungle: knocking out some tough checks. Found a natural Dead Man's Chest. Is not very common to see. Also rode a minecart rail to kill a monster for another check closeby.
Felt satisfied by that jungle exploration for now. Broke a Shadow Orb and got the Arms Dealer in the apartment. Bought a Minishark. Serves as a good starting weapon. Dug down after that for more achievements (Spider biome, Underworld). Collected enough hearts (2) to be able to get infinite. Felt okay with going to max health and mana now.
Realized it was night, from the Underworld clocks. Decided to take on some bosses. Ran over to the Dungeon to trounce Skeletron with the Minishark + Tungsten Bullets. Whipped out the summoning item for Eye of Cthulu and beat that. Planned to deal with the Eater of Worlds next. Flashed the dreaded notification of a goblin army approaching. Hates this event. Would not call it too hard. Spams you with it until you find the post-Goblin Army flag. Stopped there for the (real-life) day.
Resumed here again. Still had a few quick-ish things left. Connected to the local game server. Spat out four items for other games from achievements that did not award stuff the day before. Noticed going to the bottom of the map gave nothing. Figured it was an update change. Contained nothing important, though.
Chose wisely in coming back. Looted a progressive fishing rod from the Eater of Worlds. Opens up a lot more fish (and profit). Repaired the minecarts by fishing in the underworld, which is a nice movement assist.
Triggered a meteorite to fall by beating Eater of Worlds (or smashing an orb?). Wanted to find that immediately. Appeared in a very unusual spot: in the leaves of two living wood trees. Could have easily missed that. Stopped to turn a gnome to stone, thankfully. Crafts the Star Cannon with this meteorite. Flattens any pre-Hardmode boss with this, thanks to an unlimited supply of fallen stars for ammo.
Reports little else from further achievements and bosses. Beat Queen Bee, Wall of Flesh, and Deerclops. Checked everything except the surface glowing mushroom biome. Set that into motion, though. (Could speed up time, but eh.)
Link to the Past (visit 2)
Wanted to see what Dark World yielded. Paid off quickly. Visited Hype Cave first (the Dark World cave below where Link's house is). Handed over Post-Plantera and the Strength HM.
Had one other goal in mind: the goal itself. Trekked up to the Pyramid for the sign that states the goal: 3 crystals and beat Ganon. Okay. Not too long and not messed up.
Popped into the Dark World shops. Found only one Archipelago item: a very overpriced 180 rupee Antidote for Pokemon. Rolled really low on shop slots, apparently.
Swung through Village of Outcasts into Thieves' Town. Encountered some issues in there. Received very little survivability so far. Rocked 5 hearts (total), green mail, no bottles, no cape, and no blue cane. Contained plenty of monsters that hit pretty hard (and, appropriately, some thieves). Was not completely helpless, though. Carries the Bombos medallion and an easy magic source (large magic stun drop), plus the Master Sword.
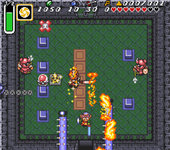
Made it to the Big Key Door after a few deaths. Poked into the boss room. Nothing. Indicates Blind as the boss. Maybe vanilla bosses? Died shortly after between the monsters that normally pop out of the sand in the desert and spikes. Maaaaybe later.
Completely spaced on Skull Woods (until writing this). Checked more overworld stuff. Proved better than the dungeon, with a Thunder Badge at one of the mirror checks.
Chose to go out-of-logic once more by going through dark areas. Navigated Dark Cross (the dark chest in Hyrule Castle) successfully. Also climbed the mountain. Made it through unscathed, despite the enemy shuffle. Received a Blindfold (for Terraria) from the old man, ironically.
Saw no reason not to hop into Tower of Hera. Climbed to the top to find...Helmasaur King (the Palace of Darkness boss). Not vanilla bosses after all. Knew this would not go well. Managed to break the mask. Inevitably died on a tail swipe.
Passed on another boss attempt for all the items on east Death Mountain. Grabbed some more useless Spring seeds and a movement speed increase for Stardew Valley, but not much else from that out-of-logic jaunt.
Almost left Link to the Past. Gave King Zora another go. Died once to a Beamos set up on the way. Figured more liberal use of Bombos would prevail. Skirted around all the trouble to King Zora. Sells Starfruit Seeds for 500 rupees. ...Shoot. Cannot resist that. Was sub-100 rupees, though. Farmed cash at the underground hideout with 50 rupees in it, followed by the Houlihan Room (an error-prevention room with ~200 rupees). Never tried that trick before. Worked first try. Bought the Starfruit Seeds, then savescummed the money back. Sends the check still.
Slay the Spire
The final game. Sticks this last in the cycle because of good odds of being able to beat it now. Depends a lot on the ascension level and seed, however. Always gets the same random seed (so the same stuff from Neow at the start, plus more). Struggled pretty hard in a past heart run. Saves your progress after beating the Act 1 and 2 bosses too, if you want it.
- Win condition: Defeat the Act 3 boss
- Character: Ironclad
- Ascension: 1-10
- Final Act (Heart): No
Earns a check on the dropped card of both bosses (rare) and every other card reward. (Notably will not get a card from those battles.) Also replaces boss relics and normal relics with checks. Totals 15 checks on normal card draws, 2 rare card draws, 10 normal relics, and 2 boss relics. Does not affect the shop at all.
Cannot ignore this game any longer. Locks in some predictions now. Bets on a season and at least one backpack upgrade for Stardew Valley. Expects to see Terraria's Hardmode here. Would not be surprised to see Surf for Pokemon. Filled the rest with money and hearts for Link to the Past.
Did not care for Neow's choices. Picked a random rare card: Exhume. Bleh. Looked at the items sent to Slay the Spire. Was pretty bare: four normal card draws, one rare card draw, and a boss relic. Zero normal relics. Chose the only +energy boss relic (2 wounds at the start) over double potion effectiveness and card draw for taking damage. Selected Demon Form (+2 strength every turn) for the rare card. Considers that okay. (Hoped for Barricade.) Recalls several Pommel Strikes (damage + card draw) for the common cards.
Randomed into Ascension 7. Adds more elites, deadlier everything, less healing from bosses, starting a little hurt, and stronger normal enemies.
Views Archipelago Slay the Spire as quite different, in feel, to the standard game. Begins strong from the early boss relics and rare cards. Ends weak because of not getting much else after that. Gains little personal benefit from fighting elites. Encourages you to fight things, also. (Personally prefers the ? locations.)
Thrashed everything in Act 1 on the back of Demon Form. Blocked while the strength racked up. Upgraded Demon Form, as well as an Armaments card (upgrades your whole hand). Always liked one of those cards. Earned a solid relic the way (Sunflower: +1 energy every 3 turns). No good items for other games yet.
Started taking more damage in Act 2. Found no good multi-hit cards (or multi-target) to really leverage the strength gains. Really needed more card draw. Ended some hands with excess energy because of wounds or Flexes. Outscaled the boss of Act 2 for the win. Was pleased to get Post-Goblin Army in this act. No progression yet, however.
Only got uglier in Act 3. Limped along from encounter to encounter. Hovered under half for a lot of the act. Resorted to a full heal at the cost of 10 max hitpoints. (Was at 5 hitpoints at the time.)
Reached the Act 3 boss, despite the difficulties. Faced the Awakened One, which has two phases and gains strength if you use Power cards like Demon Form. Worked against the upgraded Metallicizes (+4 block) which formed the defensive strategy. Drank a Duplication Potion to double Demon Form. Saw no other win condition than that. Offset the boss's strength boost with Disarm (-2 strength). Proved wholly insufficient, however. Never made it to the second phase.
Reloaded at the start of Act 3. Went no better. Opted to start from scratch, knowing what was ahead.
Ran the same seed. Receives different results by doing things in a different order, however. Chose 1 rare card of 3 for a curse for Neow's offer: Feed. Increases your max hitpoints by 3 if it kills. Considers this an excellent card for this point in the game. Doubled down by picking a second Feed for the Archipelago rare card draw. (Evidently missed a second relic grab from last run: Frozen Egg. Auto-upgrades Power cards you put in your deck. Good in a vacuum, but mean with the final boss.)
Feasted hard in Act 1. Probably went over 100 max hitpoints. Prioritized monsters and shops (to drop the curse). Absolutely idled in a fight for Feed to come around.
Noticed the deck's flaw in Act 2: no real winning cards. Remembers Clothesline, Uppercut, and Rampage. Lacked much else. Barely defeated the Act 2 boss after a long fight.
Realized a possible strategy, somewhere around the end of Act 2: Headbutt + Rampage. Plays Rampage. Powers up. Uses Headbutt to draw it again. Hardly seemed viable, given only one Headbutt and one Rampage in the deck. Seemed to get them together reasonably often, though. Looted another (upgraded) Rampage somewhere in Act 3. Better than nothing.
Challenged the Act 3 boss with 138 maximum hitpoints. Spent 10 max hitpoints again on the full heal too. Came prepared with something for the boss this time: two upgraded Disarms. Dropped its strength by 6. Hit for a mild 2x4 damage (1x4 when weak) and 12 on a single "big" hit. Clears those at the start of the second phase, however. Lucked into the second part of the strategy at the right time: duplicated Rampage into Headbutt while it was vulnerable. Built those up in the slow phase 1. Ripped off half its Phase 2 health from that. Delivered the final blow next turn, or the turn after.
Game #1 complete. Final time for that particular run: 41:37. Scored 911 points.
Releases all the remaining items when you beat the game. (Would never get them otherwise.) Contained...no progresion. Appreciates the Galaxy Soul (kinda) and the Stardrop, sure. Expected far more useful things in here. Where are they?
Time for some hints. Only needs one more item for Terraria. Prioritized that.
- Hint #1: Terraria's Hardmode at Link to the Past's Zora Ledge. Saw that on the way to the Starfruit Seeds. Requires the Flippers. Where are those?
- Hint #2: Link to the Past's Flippers at Stardew Valley's Treasure Hunter's Bundle. ...Oh boy. What does that bundle want?
Stardew Valley (visit #2)
Only played half a season. Must have some good checks left in the opening area.
Walked outside. Obtains checks through the mailbox. Contained 122 items. Where is this "early" progressive backpack?
Triggered a second wave of checks from going through the mailbox. (Gains a little friendship for raising skills.) Saw a Silph Scope flash by for getting Willy to 4 hearts. Checks out, since Willy has a birthday at the very end of Summer. Gives Pokemon something to do, technically. Cannot enter Saffron City to do Silph Co without the Tea, unfortunately.
Zipped around the map much quicker between minecarts and a movement speed boost. Used the newest major item, an improved fishing rod, to look for new fish. Notably fished up a Flounder to unlock the Fall season. Nice. Left enough time to plant a crop of Starfruits before the close of Summer too.
Mentions one other thing. Received a single garden pot. Technically allows you to grow anything out of season. Collected, like, 10 non-Summer seeds. Dreads the idea of that being the intended progression. (Admittedly has multi-day sleep, but still. Suffers friendship decay.)
Evidently hid all the good stuff in the museum. Finally earned a progressive backpack for 10 donations. Coughed up a pickaxe upgrade (the first one) at 15 donations. Finally. But where is the decent weapon? Hates the slingshot.
Grabbed a Marsh Badge from leveling mining to 4 and a progressive mail for Link at level 6 fishing. Helps both of those games. Spotted the Fly HM among the new tool upgrades at Clint's. Focused efforts on that and bought it. Theoretically opens up Pokemon. Could be the logical access to Saffron City, Cinnabar Island, Fuchsia City, or Victory Road (from the back).
Frowns. Wants a Silo. Worries less about animal feed with it. Automates animals easier. Costs 25000 gold
and 75 Hardwood, unfortunately. Will not have that kind of cash for a while. Does not even have an axe upgrade yet. Sees a bottled Fairy for Link in the same shop. Picked up the Bug Net in Slay the Spire. Pairs well for survivability. (Did not buy the bottle yet, however.)
Caught the last few fish of the season. Jumped back into the mines after that. Broke all the crates and barrels around, hoping for a weapon. Finally panned out with a weak level 1 dagger. Relied on the Slingshot and Napalm Ring before this. Barely killed anything because of the minimum range (or something causing stones to just pass through the target). Could not do tons with this dagger (typically 1-2 on the void spirits, 3-4 on bats).
Finished growing the parsnip in the garden pot. Yielded Boat Repair (Ginger Island access) for the quest and the Cape for Link to the Past (a nice safety item) for the crop harvest. Seems awfully important for a Spring-only crop. Might have been intended progression. Became even crazier than that. Led to the "Build a Coop" and "Craft a Scarecrow" quests. Grabbed a progressive glove
and a progressive bow for Link to the Past for that. Opens up quite a bit with those.
Continued finding good items. Bought a progressive backpack in Stardew Valley for 6000 gold, plus the other progressive bow for 1200ish. Might be able to beat Link to the Past soon-ish with that.
Delved further into the mines with the new dagger after that. Only now completed the "Kill 10 Slimes" quest. Risked dying to get to a big pack of crates and barrels. Passed up the staircase down to an Archipelago item to do it. Dropped to maybe 5% health with no healing items left. Regrets absolutely nothing, though. Pulled a Forest Sword (level 3) from the crates. Is not that great for this level in the mines. Hits for double digit damage on monsters, though.
A few more finds:
- Winter on level 60 of the mines. Turns to a cold area right then, rather appropriately. Definitely needs that to fill a few bundles.
- Special Request Board at 20 museum items. Why is there so much good stuff at the museum?
- Skull Cavern Key at 10 hearts with Demetrius. Stands zero chance there, but nice.
Was really struggling for money at this point. Still has pretty bad tools and no greenhouse.
Could probably reach the Ginger Island farm via the Parrot Express (unlocked already). Costs 1000 gold per trip, though. Cannot afford that regularly. Decided to finish Terraria after sticking the gems into the Treasure Hunter Bundle for Link to the Past's Flippers.
Link to the Past (visit 3)
Update: 6 hearts, Master Sword, blue mail, silver arrows, no bottles, half-magic, and a Cape. Should be able to beat dungeons with this. Saves that for later, with more health. Grabbed Terraria's Hardmode at Zora Ledge, plus the two waterfall faerie checks.
Terraria (visit 2)
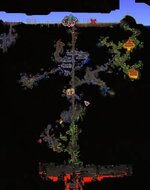
Smashed some demon altars for the new ores. Noticed it was raining. Chose to grab a Nimbus Rod with legitimate rain. Discovered the Corruption very close by, at the hill to the east. Started getting Corruption enemies by going a little too far from the house (to avoid critter spawns). Took a screenshot of the map.

Ran past the Corruption towards the beach. Sprinted past the glowing mushroom biome. Apparently finished. Got the achievement for that: the Island Obelisk in Stardew Valley. Siiiighs. The
one remaining check. Well, whatever. Did not play that many days on the second visit. Still helps a ton.
Turned off infection spread. Probably threatens a good portion of the jungle. Is not too bothered by it, though.
Found the goblin NPC almost immediately. Appreciated not having to hunt for them. Crafted some Mythral armor. (Grabbed Adamantine. Was thinking of other things.) Stocked up on souls of light and night, plus the ingredients for potions and spider fangs for a summon.
Needed some Hardmode weapon to fight Golem. Never unlocked the dungeon. (Checked. Only got five boss flags, which is pretty low.) Looked up the Super Star Shooter's recipe: just the base weapon and Hallowed Bars. Easy peasy. Teleported to the beach and made the most disrepectful, low-effort "arena" consisting of about one row of 10 wood platforms. No campfire, heart lanterns, sunflowers, or anything. Beat the Destroyer after dying, likely because of the Nimbus Rod dealing the last bit of damage. Collected those bars and headed to the main base.
Actually prepared for Golem, unlike the Destroyer. Spent ~30 platinum trying for a good modifier on the Super Star Shooter. Took Lucky, Menacing, or Warding on the accessories. Had no really stellar accessories: beginner wings, Spectre Boots, Shark Tooth Necklace, Paladin's Shield, and the Lava Charm or something. Zipped into the pyramids, after some exploration for it, and built two lines of platforms with campfires and heart lanterns everywhere.
Beat the Golem pretty handily. Never fell below...half hitpoints? Considers that one of the downsides of this goal: the weak boss. Might have been better to go for the Moon Lord in a larger multiworld like this.
Game #2 complete. Released all the items. Contained no real progression for anyone. Got some seeds, including a Rare Seed, which is needed for one of the bundles. Other than that? Filler stuff.
Pokemon Red (visit 2)
Now at 6 badges. Must be able to do something here. Headed into the Pokemon Tower. Rescued Mr. Fuji. Nothing good for that. Moves the Rocket out of the way of Silph Co, though.
Taught Fly to Paras. Looked at the map locations: nothing new. ...Is Pokemon walled again? No Tea for Saffron access. No Basement Key for the Rocket Hideout. No Rainbow Badge for the Strength boulders blocking the way to Fuchsia. No Surf for Cinnabar Island, the Pokemon League, or Cerulean Cave.
Typed in !missing for the remaining checks in Pokemon. Missed the post-route 22 rival Oak item and the Pewter scientist. Nothing good on them, though.
Okay, then. Flew around and caught a bunch of Pokemon for the Link to the Past's Red Mail. Seems time to return there and maybe beat Ganon?
Link to the Past (visit 4)
Now at 8 hearts and Red Mail, but nothing else new. Never bought the bottles in Stardew Valley.
Prioritized Thieves Town first. Remembers the Dark World Bomb shop saying it was a crystal. Knew the boss (Blind) was beatable too.

Just the standard enemy shuffle room. Did not benefit that much from Bombos here. Was more scared of the rollers initially. Crosses over each other at the entrance.
Looted the Cane of Byrna (blue cane) from the Thieves' Town Big Chest. Performs pretty well versus Blind. Did not really need it (or use it, for that matter). Was not the smoothest Blind fight, but good enough for a crystal.
Completed the blacksmith chain. Made sense to head into Swamp Palace. Hoped it was a crystal and beatable. Spent the time for a thorough looting. Took a good amount of chip damage from monsters here and there.
The boss of Swamp Palace: Mothula (Skull Woods' boss). Aced this battle, thanks to Swamp Palace's boss arena being much simpler than Mothula's home arena. Received a crystal for it. 2/3 crystals.
Cashed in two hints. Wanted Tempered Sword (red sword) for Ganon. Potentially clears a dungeon for the last crystal and grabs a sword in the process.
- Progressive Sword at Stardew Valley's Anchovy. An easy Spring and Fall fish. Does not want to change games, though.
- Progressive Sword at Stardew Valley's Have Another Baby. Yikes. Definitely not getting that. (Note: Thought you had to use the Wedding Ring, which needs Iridium Bars, a lategame item. Not as bad, but still not accessible now.)
Passed on doing bottle hints. Knew where three bottles were in Stardew Valley: one as a bundle set completion, one for sale at a reasonable-ish price, and one at the bottom floor of the mines (120).
Knew Eastern Palace was a crystal. Should be relatively quick with no other items left. Found vanilla Armos Knights in the back. Stood no chance versus silver arrows. Crystal 3/3.
Decided to give Ganon a shot, without the Tempered Sword. Was in for a small surprise. Heard about needing Master Sword spins for beating Ganon without Silver Arrows. Needs the spins to hurt Ganon
at all also. Held the Cape at the ready for quick damage dodges (2 hearts of damage for basically any hit, out of 8 hearts total).
Reached the final phase. Ran out of magic, unfortunately. Burned a ton of magic trying for the torch glitch with the Fire Rod, even with half-magic (no Lamp, sadly). Felt within reach, however.
Attempted Ganon...at least ten times, before getting the victory. Lived until the last phase a few times. Fell once. Ran out of magic a second time. Only took one hit on the winning attempt.
Game #3 complete. Filled the backend of the other two games with boring stuff. Hopes for better this time.
- Progressive Watering Can x2 (at Turtle Rock Laser Bridge and Palace of Darkness boss) and Progressive Hoe (at Ganon's Tower)
- Five crop seeds and a new fruit tree for Stardew Valley
- Progressive weapon for Stardew Valley (another slingshot?) (at Mire Shed)
- Bottle at Superbunny Cave. Could have gotten that quickly. Would have made things so much easier. Thought about going up dark Death Mountain.
- Surf HM (at Ganon's Tower). Nice. Unwalls Pokemon. Wonders how many crystals it was to enter.
- Rainbow Badge (at Ganon's Tower, validation chest at the very top). More stuff for Pokemon. How many things were in Ganon's Tower?
- Bicycle (at Ice Palace Big Key Chest) and Poke Flute (at Desert Palace Big Key Chest). Gets around that with the Rainbow Badge, although likely sooner, logically.
Looked at the spoiler log quick, out of curiosity. 1 crystal for Ganon's Tower. So, in...wait, not in logic yet. Did not have logical Death Mountain access (no Lamp or Flute).
Sits at one item (the Earth Badge) away from completing Pokemon. Makes sense to hint.
- Red's Earth Badge at Stardew Valley's Farming Level 3
Psh. Says how little farming has happened in Stardew Valley. Spent most money on sending items, rather than investing in low-profit seeds.
Stardew Valley (visit 3)
Only 61 items in the mailbox. Expected more.
Discovered the progressive weapon to be a level 2 dagger. Worse than the current weapon, but a weapon.
Plunked down the Island Obelisk immediately. Planted 19 different seeds. Will be quite a payout of items when those come up.
Reached Farming Level 3 and 4 from the Starfruit seeds. Sets Pokemon ready to go.
Poked into the Volcano Dungeon. Deals a lot of damage to someone with +1 defense/+1 immunity boots. Still has the weak sword doing 1-12 damage.
Planned to stick around longer. Ended up taking a break on the last day of Summer. Why not switch to Pokemon, then?
Pokemon Red (visit 3)
Owns all eight badges, as well as all the HMs. Runs into a problem of levels now. Expects fairly high levels on the Elite Four, given the eight badge requirement. Stands at level 32 on Zapdos right now. Should be able to find a decent high level somewhere.
Went into Cerulean Cave first. Only 4 badges for entry. Level 35 on a Dewgong at the entry. Increases deeper into the cave, but probably not by that much, given that badge requirement.
Played the PokeFlute for the Snorlaxes. Caught the level 41 Scyther with Defense as its highest stat, followed by Special (ignoring whatever HP it had). Eh. Just Drowzee for the other one.
Perhaps in Victory Road? Was unimpressed by the rival fight with level 22 Pokemon, followed by level 22 outside of the Victory Road cave. Found more mid-35s on the first level. Increased to 44-47 later on. Eh. Caught some, including a 47 Poliwhirl. Did not find the Water Stone yet, however.
Picked up something else in Victory Road: the Rocket Hideout key and the Power Plant key. Followed the trail to the Power Plant. Ought to be good level, between sphere and distance from Pallet Town. Met a level 52 Dratini at the door. Definitely caught that. Investigated all the traps. Added a Chansey and Oddish to the roster.
Pulled the Power Plant catches out of the box and evolved them with Rare Candies and a stone.
(HP/Attack/Defense/Speed/Special)
- Dragonite: 177/109/107/160/120 (level 55)
- Vileplume: 155/77/123/99/107 (level 57)
- Chansey: 136/11/24/121/283 (level 55)
- Zapdos: 160/95/86/86/80 (level 38)
Apparently shuffled Chansey's normal Hitpoint stat to its Special stat. Really risks it with that Defense stat, though.
Learned Surf and Flamethrower on all three. Chose Dragonite as the main, largely for one reason: Spore. Could not teach that one to Chansey. Came with the benefit of starting with Thunderpunch, on top of not being as risky.
Level 56 on Lorelei's first Pokemon. Saw two eeveelutions on their team. Used a simple Spore and X-item stacking strategy. Could not really stop that.
Continued with that strategy the whole way. Took some damage from Weezing, who survived a +5 Surf. Spent the last three Rare Candies on Dragonite. Handled the rival and their level 70 starter (now Seaking) no problem.
Game #4 complete. What spoils did Pokemon hold?
- Traveling Merchant day in the Mansion (plus a discount). Also a Secret Key for Blaine's gym in there. Mansion B1F - West item. Is that vanilla? ...No. Normally gets that in the northwest. Replaced the Solarbeam TM, probably.
- Progressive Coop, Pierre's Missing Stocklist (buy crops in any season), and a Progressive Pickaxe in Rocket Hideout.
- A cute baby, a movement speed increase, Spring season, and 5000 gold in Silph Co.
- Another Traveling Merchant day on Monday
- Professor Snail Cave from Sabrina. Wondered why that would not open. Figured something like that.
Nothing really good for anyone else, beside some health for Link to the Past and kind of the rare card draw + relic for Slay the Spire.
Still no axe upgrade. Placed all four somewhere in Stardew Valley. Maybe on the crops? Or the many Fall fish?
Stardew Valley (visit 4)
Returns to the final game. Finished, like, 3-4 bundles out of 30 or so.
Closed out Summer, finally, with the Dance of the Moonlight Jellies. Bought the Island Farmhouse there for cheap. Chose Fall as the next season. Saw plenty of Fall Forage-related bundles.
What important things are still missing to complete these bundles?
- The Slime Hutch. Cannot find Slime Eggs until then. May have the slime egg press recipe, though.
- Cooked food. Could be problematic. Unlocked the kitchen, but not many recipes. Hopefully buys some of these. Got the Queen of Sauce for recipes too.
- Red Cabbage and maybe Rhubarb?
- Another Coop upgrade for Rabbits.
- Void Egg or Golden Egg. Cannot access the sewers. Never got a golden egg as a reward.
- Money. A lot of it. Needs it for animals, the money bundles, and maybe blacksmith upgrades/the Traveling Merchant.
Holds off on hinting for now. Likely gets something from all these crops and Fall fish.
Finished some easy bundles. Crafted the bombs for a Progressive Axe (finally) and stuck in the Purple Mushroom for some Red Cabbage seeds. Solves at least one problem.
Refocused in-between playing. Needs raw cash more than anything. What is a good way to do that? Fishing? Goes kind of slow without bait. Could hint for a new fishing pole. Probably makes more sense, out-of-game time-wise, to forego Friendships, outside of birthdays. Instead, multi-sleep for Starfruit and/or Ancient Fruit Wine. Needs to build up some cash for the Starfruits first, not to mention get kegs. Means more tappers and more wood. Solves some of the immediate cash problem with fishing for new fish.
Found Link's Flute from a Kale harvest. Puts Ganon's Tower in logic (not that it matters). Reeled in a new fishing pole by catching a Walleye, which is needed for a bundle anyways. Discovered two progressive weapon upgrades between a crop and a fish, handing out a level 6 dagger and a level 8 club. Accepts the club over the level 3 sword.
Wound up doing extra checks. Lacks too many things necessary to win to ignore
everything. Got a Pickaxe upgrade from doing the Mayor's Shorts quest. Made the mines and Volcano Dungeon even more appetizing.
Sprinted through the volcano, occasionally stopping for Magma Caps (for a bundle) or Iridium Ore. Actually got a Prismatic Sphere. Hoped that would become a Galaxy Sword, but alas, no. Randomized that too.
Picked up a nice weapon from a chest, on the plus side: a level 12 dagger. Dislikes daggers because of their poor range and small hitbox. Overlooks its faults for the damage. Reached the top of the volcano. Found...an ugly baby in a chest. Nothing good from floors 85-120 of the Mines either, for the record.
Received the Hops starter (for one of the brewing bundles and a quest). Mentions a Tulip Bulb from level 9 fishing, which then led to the Coop upgrade. Placed that pretty deep in logic.
Realized the cooked items bundle was not that bad. Purchased several from the saloon.
Worked on special orders that were reasonable during all this. Included Robin's Request for 80 Hardwood. Forked over the Slime Hutch for that. Yeesh. Becomes even worse when you only have the Copper Axe. Cannot logically access the Secret Woods for daily mahogony stumps. Saved up all the stumps around the farm for this, thankfully. (Also got a ton of hardwood via the mahogony trees on Ginger Island.)
What items remain that are completely out of reach? Sewer Key/Golden Egg and Rhubarb seeds. Sounds like hinting time.
- Dewy's Rhubarb Seeds at Winter Fishing Bundle in Stardew Valley
Simple enough.
Finally went into Skull Caverns. (Got a Foraging Level just for using the key. Whoops.) Went down to floor 25 after a try or two for a Progressive Axe. Made that one annoying to get.
Crafted a Slime Egg Press after one of those Skull Cavern dives (for more Fire Quartz). Got a free green egg for building the Slime Hutch. Needed a Red Slime Egg, which is a 9.5% chance. Only had enough slime for one shot. Hit the jackpot and got the Red Slime Egg. Installed Mushroom Boxes in the farm cave for finishing that. Felt pretty mean after just completing a different bundle with 20 Common Mushrooms. Spent a decent amount of time wandering around, checking the Secret Woods, and the Ginger Island mushroom cave for those.
Entered season #3: Winter. Caught that Perch for the hinted Rhubarb Seeds, along with the only other available Fishsanity fish (Squid).
Almost reached the end. Describes the bulk of Winter like this: Get up. Maybe give the animals more hay. Look at the Traveling Merchant for items (now at 2 artifacts per day). Teleport to the beach. Check for Nautilus Shells. (Needed three for bundles, including a gold-star quality one.) Took over halfway into Winter to find it. Continuing checking for the gold-star Oyster.
Delved into the volcano dungeon maybe three times in Winter? Tried for either the Ostrich Egg in the floor 9 chest or the journal scrap for the Ostrich Egg. Grabbed the scrap first. Notably picked up an unneeded Tiger Slime Egg along the way.
Saw some good profit from a modest amount of kegs. Bought a pig and rabbit in mid-Winter. Keeps the hay cost down, while still being ready for a better season. Forked over the 32500 gold for the cash bundles after the Night Market concluded.
Did not stop doing some quicker checks, such as birthdays and events. Hoped for a Golden Egg, Sewer Key, or some Foraging levels. Of note:
- Dwarvish Translation Guide from 8 hearts with Harvey.
- Progressive House from buying a painting. (Listed the Abandoned Jojo Mart bundle in the spoiler log. Worried about needing this. Nope.)
- The final Farming level from Midnight Squid. Also unlocked the Greenhouse from getting enough skill experience for Fishing Level 10. Buried that so deep.
- A Golden Egg from 8 hearts with Evelyn...and a second Golden Egg for 10 hearts. Earned both at the same time from giving a loved birthday gift. Hid them both there? What?
Hit go-mode with those eggs. Continued doing events and birthdays for possible Foraging levels. Skipped to Summer, the fourth season played, once those were all over.
Opened up the barn door for the pig. Spawned a truffle within seconds, right at the door. High five. Collected a Rabbit Foot waiting in the autograbber. Combed the beach for either a gold-star Oyster or a gold-star Rainbow Shell. Scored the oyster on day 3. Plugged it in the win.
Game #5 complete. Released the remaining 108 items, 70 of which were for Stardew Valley. Notable remaining items:
- Progressive Pickaxe at the Tub o' Flowers recipe.
- Link's Lamp at the Fresh Fruit quest. (Knew about that one.)
- Progressive Axe at the Fish Stew quest (an easy Winter fishing one). Accepted that quest near the end. The other Progressive Axe at the Strong Stuff special order.
- Forging levels at Mayor's Need (Truffle Oil quest), Aquatic Overpopulation special order, and the Iridium Axe upgrade. Sheesh.
- Rusty Key (sewer access) at Biome Balance special order.
- Pokemon Red's Tea at the Tropical Fish special order. Why were the special orders so stacked?
- Removal of Glittering Boulder at 95 museum donations, removal of Railroad Boulder at 50 minerals, and Progressive Shed at Dwarf Scrolls. (Hit the 70 donation milestone, for the record.)
- Junimo Hut at Iridium Hoe upgrade. Saw this. Was not forking over 25000 gold, especially since almost nothing was on the main farm (and they do not gather if you go to bed early).
- Bridge Repair (for the Quarry) at Iridium Pickaxe upgrade.
Hit level 10 in every skill except Foraging (at level 9), in terms of checks. Received levels 9-10 in everything except Foraging, coincidentally, which was at 7.
Played Stardew Valley kind of inefficiently. Burned so much cash on sending checks. Should have grown that money first. Ideally plays another game first to pass on halfway decent seeds and upgrades before beginning Stardew Valley.
Would be interested in sticking Stardew Valley in again, but with some changes. Likely spent as much time there as the other four games combined.
- Thematic bundles, not remix. Keeps it fresh, but not too long.
- Exclude Ginger Island 50-75% of the time. Wants seasons to be a little more important. Accepts the occasional island visit or early greenhouse, just not all the time.
- Either remove Friendsanity OR change it to 5+ hearts and at x4 gain. Feels less bad about sleeping multiple days that way, but also reducing the number of checks there. Or maybe Bachelors only with x3 gain?
- Remove Special Orders, or put it on a low chance. Takes really long for some of them.
- Skill gain at x3. Figured x2 might be a little low. Went with the default.
- Tool progression at Progressive Cheap (2/5 the normal cost). Costs a fortune for the later upgrades by default, in this timeframe.
- Museumsanity: Maybe put it on 50/50 between none and milestones. Mitigates some of the craziness by the Traveling Merchant getting museum items with the correct upgrade. Likes caring about donations. Stinks if something good is at a lot of donations, particularly with Ginger Island off. Costs a lot before the discount upgrades, though. Saw a fan going for 42000 with the upgrades. Scooped up some cheap sub 1000 artifacts, though.
For other games: Moon Lord goal (for 4+ games) and switch crystals for Ganon to random-high.
Had a good time overall, also. Looks forward to the next one of these.

